Why a Spongy Lever Can Survive a Correct Bleed
Brake bleeding has gotten less clear-cut with all the conflicting advice flying around. You followed the procedure exactly. You pushed fluid through the system, watched bubbles exit the caliper, and still — the lever compresses halfway to the bar before any real resistance kicks in. Maddening doesn’t cover it.
Here’s the thing most guides won’t tell you: the problem isn’t always a bad bleed. Air survives by hiding in specific zones your technique never reached. Or fresh micro-bubbles keep forming at the master cylinder faster than you can purge them. Sometimes it’s not air at all — it’s a worn seal or a hose quietly failing on the inside.
As someone who spent three seasons wrenching at a shop specializing in drivetrain and brake service, I picked up the practical knowledge of post-bleed sponginess. There are three distinct root causes. Treating them identically wastes hours. Today, I will share it all with you — how to diagnose which one you’re actually facing, then fix it without tearing apart the entire system.
Check the Lever Position and Bleed Port Angle First
Worth putting near the top. It solves maybe 30% of post-bleed sponginess without touching a syringe.
Before blaming air pockets, go back and check how you positioned the lever during the last bleed. Most riders bleed with the bike standing upright, lever in its natural resting position. That’s the mistake. On Shimano systems, the lever should rotate until the reach-adjust barrel points toward the ground — roughly 45 degrees downward from horizontal. On SRAM road brakes, rotate it even further; the bleed port screw faces roughly backward and down.
But why does the angle matter? In essence, it’s about where air collects inside the master cylinder. But it’s much more than that. The piston and its sealing cup sit at an angle inside the lever body. Leave the lever upright and the highest point inside the cylinder — where air pools — sits somewhere your syringe pressure simply can’t reach. Rotate the lever correctly and that pocket faces the bleed port opening directly. Different situation entirely.
Check your handlebar roll too. A bar rotated even 10 degrees forward or backward shifts the lever’s effective angle relative to the reservoir. The reservoir itself should sit level or tilted slightly rearward. Nose-down, and air migrates toward the master cylinder instead of away from it.
Write down where you positioned the lever last time. Look at your bleed port. Can you picture air trapped there? If yes, rotate the lever to the correct angle for your specific brake model, confirm the reservoir is level, and move on.
How to Isolate Whether the Air Is in the Lever or Caliper
Frustrated by a spongy lever but unsure where the air is actually sitting, grab the bike and run the squeeze-and-hold diagnostic before doing anything else.
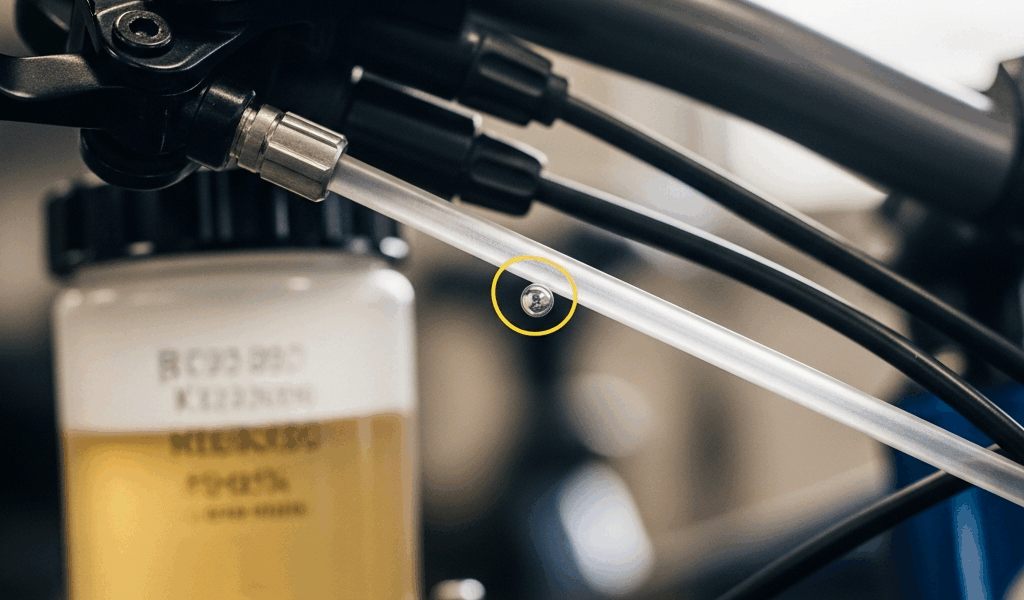
With the bike upright and wheel off the ground, cycle the brake lever 10 times at moderate pressure — not hard, not gentle. Then hold the lever at the exact point where you first feel real resistance. Crack open the bleed port screw at the lever a quarter turn. Just a quarter. Watch and listen.
A sharp hiss followed by the lever dropping deeper into the bar? That’s your answer. Compressed air just depressurized through that port. The lever drop is the tell — system pressure relieved, piston moved inward. Air is in the master cylinder or somewhere in the line between lever and caliper.
Crack the port and hear nothing — or barely a whisper — then squeeze again and feel almost no change in firmness? The air is living in the caliper. Caliper-side air doesn’t hammer lever feel as dramatically. The caliper piston has more travel room than the master cylinder piston, so it moves slowly and inconsistently rather than going suddenly soft.
Close the bleed port immediately after this test. You now know exactly which end to target. That’s what makes this diagnostic endearing to us home mechanics — one quarter-turn of a screw and the system basically tells you where the problem is.
Re-Bleed the Affected End Without Redoing the Whole System
Once you’ve isolated the air location, you can run a surgical re-bleed on just that section. So, without further ado, let’s dive in.
Master Cylinder or Lever-Side Air
Position the lever at the correct angle again. While you won’t need a full bleed kit setup, you will need a handful of things: a syringe filled with fresh fluid, a bleed port adapter for your brand, and a clean rag underneath the lever. Use Shimano mineral oil for Shimano brakes, DOT 5.1 for SRAM — never mix them. Spare yourself the wrong turn I took. I’m apparently sensitive to DOT fluid irritating my hands and Shimano mineral oil works for me while DOT fluid never agrees with a long wrenching session.
Attach the syringe to the bleed port. Open the port a half turn. Push fluid slowly while watching the syringe and hose — you want a thin, steady stream with zero bubbles visible. Push 5 to 10 milliliters through. You’ll feel resistance building as the fluid pressure works against the piston seal.
Stop when resistance feels consistent and firm — like pushing against a wall. That wall is the piston bottom. Close the bleed port, cycle the lever 20 times, repeat the sequence three times total. Third pass, the lever should feel noticeably firmer. Crack the port one final time to release any remaining air. Done.
Caliper-Side Air
If the air is at the caliper, attach your syringe to the caliper’s bleed port instead. The caliper piston sits in a bore with less precision than the master cylinder — it accepts fluid more readily, less dramatic resistance. You might even see the piston move visibly as you push.
Push the same 5 to 10 milliliters of fresh fluid slowly through while watching for bubbles in the clear hose. Once the stream runs clean, close the bleed port and cycle the lever 20 times. Check the feel.
Caliper air often needs two passes. The piston bore is larger, the dead space bigger. That was expected. Don’t panic if you’re repeating this once more — it’s normal.
When the Spongy Feel Is Not Air at All
You’ve re-bled both ends. The lever still compresses like a wet sponge. Now we look elsewhere.
A Compromised Hose
But what is a failing brake hose doing to your lever feel? In essence, it’s flexing under pressure instead of transmitting force rigidly to the caliper. But it’s much more than that — internally the liner delaminates, creating a balloon effect you can’t see from outside.
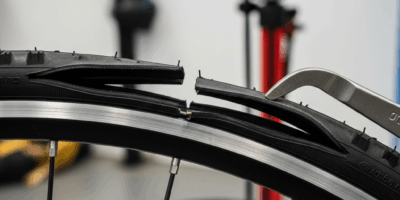
Inspect the entire hose, especially at the lever end and caliper end where it bends the hardest. Look for cracks, splits, swelling, or sections that feel soft when pinched. The diagnostic is simple: squeeze the lever hard and watch the hose. A healthy hose stays rigid. A failing hose bulges slightly. If you suspect the hose, replace it. First, you should check pricing at your local shop — at least if you want the correct barb size for your model. Most Shimano or SRAM hose kits run between $25 and $45 and include compression fittings and barbs. Shimano BH90 hose, for reference, runs around $28 for 1000mm.
A Failing Master Cylinder Seal
A worn piston seal inside the master cylinder lets fluid bypass the piston as you squeeze. No pressure builds. No amount of bleeding fixes it — because the system isn’t actually sealed. That’s a different problem entirely.
Test this by holding the lever firmly at maximum squeeze for 10 full seconds. If the lever drifts inward — slowly creeping deeper toward the bar under constant pressure — the seal is leaking. A healthy seal locks the lever in place. No creep. Zero movement.
A compromised seal might be the best option to address first here, as brake service requires a methodical order. That is because swapping a seal kit eliminates a variable before you spend money on a new caliper. Rebuild kits run roughly $15 to $30. Seals age. Mineral oil contaminated with water can cause swelling in Shimano seals. DOT fluid hardens seals over time. Neither is quick to diagnose from the outside.
Decision Point
Spongy lever after a second targeted bleed, hose inspection clear, no seal creep detected? The caliper itself or the master cylinder needs a rebuild or full replacement. This new idea of “just re-bleed it” has taken off over the years and eventually evolved into the catch-all fix enthusiasts recommend and repeat today — but it has real limits. You’ve hit them. Order parts or take the bike to a shop. You diagnosed correctly. You did the work. Now you hand it off.


Stay in the loop
Get the latest pro bike tech updates delivered to your inbox.