The Complete Guide to Bicycle Drivetrain Maintenance
Your bicycle drivetrain is the heart of your riding experience, converting your pedaling effort into forward motion. Understanding how to properly maintain these components can extend their lifespan by years and save you hundreds in replacement costs. This comprehensive guide covers everything from basic cleaning to advanced adjustment techniques.
Understanding Your Drivetrain Components
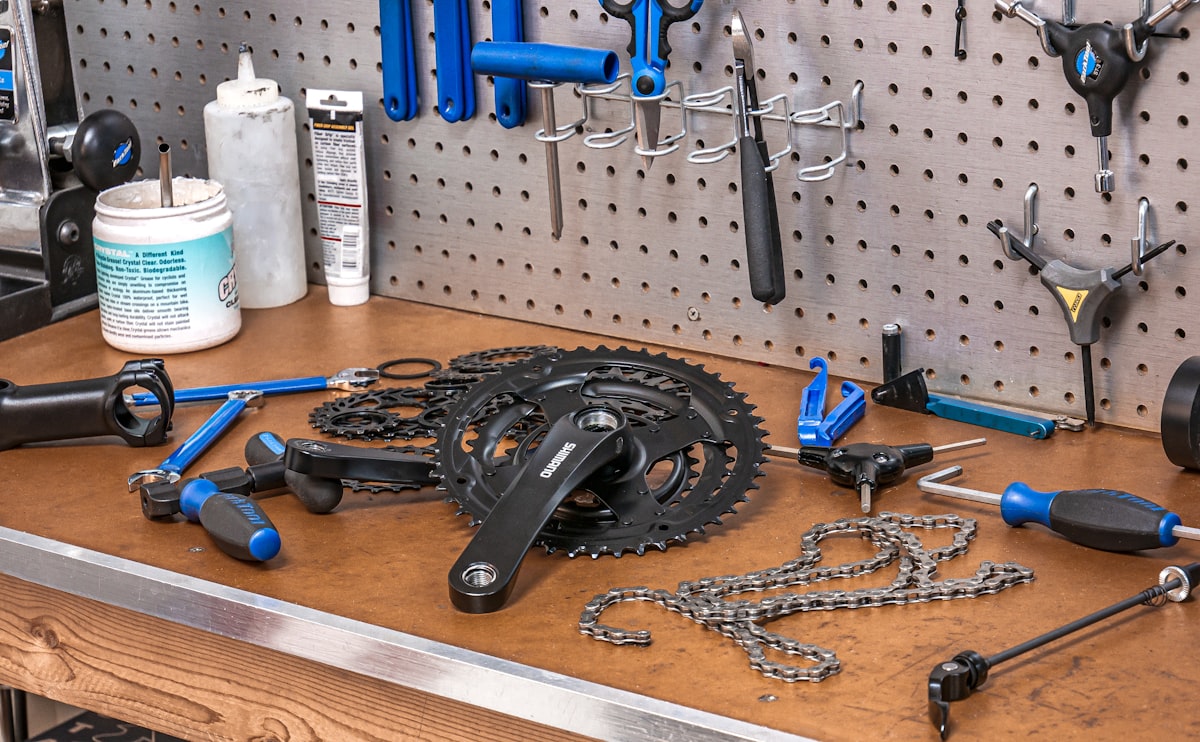
Before diving into maintenance procedures, it helps to understand what makes up your drivetrain. The system includes several interconnected parts that must work in harmony.
The Chain
Your chain is the most frequently replaced drivetrain component. Modern chains consist of outer plates, inner plates, pins, and rollers. Each link must articulate freely while maintaining precise tolerances. A new chain measures exactly 12 inches across 12 complete links. As the chain wears, these measurements increase, causing poor shifting and accelerated wear on other components.
Cassette and Chainrings
The cassette sits on your rear hub and provides the range of gears for climbing and descending. Modern cassettes range from 9 to 13 speeds, with tooth counts typically spanning from 11 to 34 teeth. Chainrings mount to your crankset and drive the chain forward. Most road bikes use two chainrings while mountain bikes often use just one.
Derailleurs
Front and rear derailleurs move the chain between gears. The rear derailleur handles most shifting work, moving across your cassette while maintaining proper chain tension. The front derailleur, if equipped, moves the chain between chainrings for large gear changes.
Essential Cleaning Procedures
Regular cleaning prevents the grinding paste that forms when lubricant mixes with road grit. This contaminated lubricant accelerates wear dramatically.
Weekly Chain Cleaning
For weekly maintenance, wipe your chain with a clean rag after each ride. This removes surface contamination before it works into the rollers. Apply fresh lubricant to the inner surfaces of each link, then wipe away excess. A properly lubricated chain feels smooth but appears nearly dry.
Monthly Deep Cleaning
Monthly deep cleaning requires removing the chain for thorough degreasing. Modern quick links make this straightforward. Soak the chain in degreaser for 15 minutes, then scrub with a brush to remove all contamination. Rinse thoroughly and dry completely before re-lubricating.
Cassette and Chainring Cleaning
Use a cassette brush or floss tool to clean between cogs. Spray with degreaser and scrub each cog face. For chainrings, a stiff brush removes accumulated grime from tooth valleys where contamination causes the most wear.
Lubrication Strategies
Proper lubrication reduces friction and prevents corrosion. However, more lubricant is not better. Excess lubricant attracts more contamination, defeating its purpose.
Wet vs Dry Lubricants
Wet lubricants contain heavier oils that resist washing away in rain. They attract more dirt but provide superior protection in wet conditions. Dry lubricants use wax-based formulas that run cleaner but wash away quickly. Choose based on your typical riding conditions.
Application Technique
Apply lubricant to the inner chain links while slowly rotating the pedals backward. One drop per link provides adequate coverage. After applying, continue rotating the drivetrain for 30 seconds to work lubricant into the rollers. Then wipe away all excess from outer plates.
Chain Wear Assessment
Replacing your chain before excessive wear develops protects your cassette and chainrings from damage. A worn chain causes accelerated wear on these more expensive components.
Using a Chain Checker
A chain checker tool provides accurate wear measurements. Insert the tool between chain links. If it falls fully into the chain, replacement is needed. Most tools indicate 0.5% and 0.75% wear levels. Replace at 0.5% for optimal cassette life, or at 0.75% maximum.
Ruler Measurement
Without a tool, measure 12 complete links from pin center to pin center. A new chain measures exactly 12 inches. Replace when this measurement exceeds 12 1/16 inches.
Derailleur Adjustment Fundamentals
Properly adjusted derailleurs provide crisp, reliable shifting. Most adjustment issues stem from cable tension problems rather than limit screw settings.
Cable Tension
Start with the barrel adjuster threaded mostly into the derailleur. Shift to your smallest cog. If the chain hesitates shifting to larger cogs, increase tension by turning the barrel adjuster counterclockwise. If it hesitates shifting to smaller cogs, decrease tension by turning clockwise.
Limit Screws
Limit screws prevent the derailleur from moving beyond your gear range. The high limit screw stops outward movement toward the smallest cog. The low limit screw stops inward movement toward the largest cog. Adjust so the derailleur pulleys align directly with the first and last cogs.
B-Tension Adjustment
The B-tension screw controls the gap between the upper pulley and cassette. Too close causes noise and potential contact with the cassette. Too far reduces shifting crispness. Aim for approximately 5-6mm clearance with the chain on the largest cog.
Troubleshooting Common Issues
Understanding common problems helps you diagnose issues quickly and accurately.
Chain Skipping
Chain skipping under load usually indicates worn components. Check chain wear first. If the chain is new but skipping occurs, the cassette likely has worn teeth that no longer mesh properly with the new chain. Replacing both components together prevents this issue.
Slow or Inconsistent Shifting
Sluggish shifting often results from contaminated or damaged cables. Housing can develop internal corrosion that creates friction. Replace cables and housing annually, or immediately if shifting degrades noticeably.
Chain Dropping
If your chain falls off the chainrings, check front derailleur limit screws. The inner limit should prevent the cage from pushing the chain past the inner ring. Cage alignment should parallel the chainrings with approximately 2mm clearance above the outer ring teeth.
Replacement Intervals
Understanding when to replace components prevents cascading damage and ensures reliable performance.
Chain
Replace your chain every 2,000 to 3,000 miles for road riding, or when wear indicators show 0.5% stretch. Mountain bike chains often need replacement every 1,000 to 2,000 miles due to harsher conditions.
Cassette
A properly maintained cassette can outlast two to three chains. Replace when teeth develop a shark fin profile or when a new chain skips on specific cogs.
Chainrings
Chainrings typically last longer than cassettes due to their larger size distributing wear. Inspect for hooked or worn teeth. Most riders replace chainrings every 10,000 to 15,000 miles.
Cables and Housing
Replace shift cables annually or when shifting performance degrades. Housing should be replaced whenever you notice kinks, contamination, or fraying at the ends.
Professional Service Recommendations
While most drivetrain maintenance can be done at home, certain tasks benefit from professional expertise.
Have a professional assess your drivetrain annually to catch issues you might miss. They can evaluate wear patterns that indicate alignment problems or riding style adjustments that could extend component life.
If you experience persistent issues despite following proper adjustment procedures, a shop can identify problems with derailleur hangers, hub bearings, or other related systems that affect drivetrain performance.
Conclusion
Consistent drivetrain maintenance rewards you with smoother shifting, longer component life, and more enjoyable rides. The time invested in regular cleaning and lubrication pays dividends in reduced replacement costs and reliable performance. Start with the basics and gradually develop your skills to handle more advanced adjustments as your confidence grows.


Stay in the loop
Get the latest pro bike tech updates delivered to your inbox.