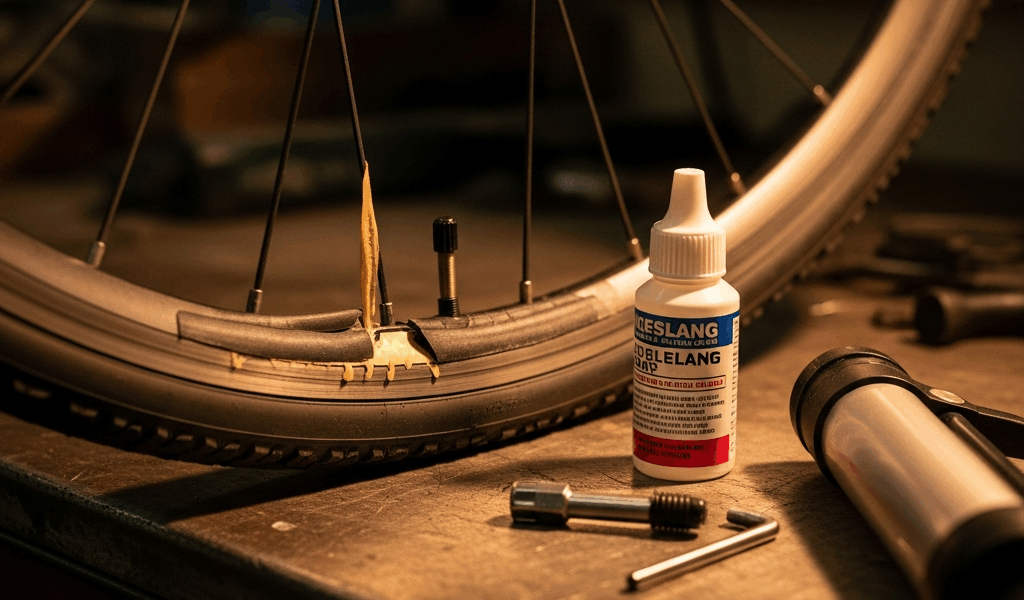
Why Tubeless Tires Fail to Seat
Tubeless setup has gotten complicated with all the conflicting advice flying around. Everyone’s got an opinion. Most of it skips the part where you’re standing in a garage at 9pm, tire half-mounted, sealant on your shirt, wondering what went wrong.
This article includes affiliate links. We may earn a commission at no extra cost to you.
As someone who has spent three years troubleshooting tubeless setups in parking lots and driveways for friends, family, and the occasional stranger at a trailhead, I learned everything there is to know about why beads refuse to seat. Today, I will share it all with you.
Here’s the short version: air is either escaping faster than your pump can build pressure, the bead isn’t reaching the rim shelf where it locks in, or something is blocking airflow through the valve entirely. Three categories. Wildly different fixes. A clogged valve core costs five minutes and a small screwdriver. A rim that’s out of round costs either new equipment or a trip to a mechanic. Knowing which problem you have is everything.
So, without further ado, let’s dive in.
Check These Three Things Before Anything Else
Rim Tape — The Silent Killer
Rim tape failures account for roughly 60% of seating problems. Not the tape itself, usually — the installation.
Pull the tire off and look at the tape under decent light. Hunt for gaps. Check the sides of the rim first. Tape should wrap fully with zero exposed rim showing through. Then check the valve hole area. That’s where I made my first tubeless mistake, honestly. I didn’t overlap enough around the valve opening — left maybe a quarter-inch of bare rim — and spent a solid hour wondering why pressure wouldn’t hold. Don’t make my mistake.
Gaps mean the tape is too narrow for your rim width. Standard rim tape comes in 19mm, 21mm, 23mm, and 25mm widths. Measure your rim’s inner width with calipers if you have them. No calipers? A cheap ruler works fine — just measure the flat section where the bead sits. The tape should run 2–3mm wider than that measurement so it wraps the sides without bunching.
Some rims need double-layer tape. Aluminum rims with rough or textured surfaces, especially. Lay down a base layer, then apply a second layer rotated about 90 degrees. It creates redundancy and seals surface irregularities that a single layer misses.
The valve hole is critical. Poke a clean hole through the tape and make sure the edges seal tightly around the valve stem. If the tape is fraying at the edges, trim it with a sharp utility knife. Torn tape equals an air leak. Simple as that.
The Valve Core — Check It Now
But what is a clogged valve core? In essence, it’s dried sealant — usually white or tan — that’s built up inside the valve body and partially or fully blocks airflow. But it’s much more than that, because even a partial blockage will completely defeat your ability to build pressure fast enough to seat the bead.
Unscrew the valve core with a valve tool — a KOM Cycling tubeless sealant injector with valve core removal tool handles both tasks and costs about the same as a standalone tool. Look inside the valve body. See any gunk? Remove it. Soak it in rubbing alcohol for thirty seconds, then blow air through it. If air moves freely, reinstall it hand-tight. Not wrench-tight. Just snug.
If air still won’t flow after cleaning, throw the core away. Fresh Schwalbe, Stan’s, or Vittoria replacement cores run under five bucks. While you have a new core in hand, put a tiny amount of grease on the threads before installing. Makes future removal painless and prevents the seal from sticking over time.
Bead Seating by Hand — Before the Pump
Probably should have opened with this section, honestly. Two minutes of hand-seating catches obvious problems before you’ve pumped anything.
Inflate the tire slightly — with your mouth if necessary, just enough to take the slack out of the rubber. Then work around the tire pressing the bead down onto the rim shelf. You should feel the bead snap into position with a little resistance. Sometimes there’s an audible click or pop.
If the bead won’t click down, check the tire’s direction arrow first. Tires are directional. Installing one backwards creates fitment issues that look mysterious until they’re not. If the direction is correct and the bead still won’t sit, the rim might be out of round — more on that below.
How to Seat the Bead Without a Compressor
The Floor Pump Burst Method
Remove the valve core again. Use a floor pump with a large chamber — most modern pumps work fine here. Pump hard and fast, 15 to 20 strokes, building volume as quickly as possible. The goal isn’t high pressure. It’s volume delivered fast. Stop and immediately reinstall the valve core while pressure is still building inside the tire.
Sometimes this works on the first try. Sometimes the bead seats partway, then deflates. That’s okay — it just means the bead isn’t fully locked yet. Keep going.
The Soapy Water Trick
Mix a spray bottle with water and a single drop of dish soap — I use Dawn, apparently that’s my brand, and generic dish soap never seems to work as well. Spray the entire bead area on both sides where the tire meets the rim. Soap cuts friction and lets the bead slide up onto the shelf instead of dragging against it.
Repeat the floor pump burst with soapy water in place. The bead often pops over the edge on the second or third attempt. When it does, you’ll know — it’s loud.
Tire Boosters and Blast Canisters
While you won’t need a shop compressor, you will need a handful of tools if you’re doing tubeless regularly. A tire booster or air blast canister — typically $30 to $60 — is worth the investment. The Topeak JoeBlow Booster is both a standard floor pump and a tubeless tire booster in one unit — it stores an air charge in an integrated aluminum chamber and delivers it in a single burst to seat stubborn beads.
I’m apparently stubborn about buying tools and resisted purchasing one for two full years. Then I got a particularly difficult Maxxis Minion DHF and Ibis carbon rim combo. That was a Tuesday. The booster fixed it in under a minute. Now it lives in my repair bag permanently.
That said, not every setup needs one. Some tire-and-rim pairings seat easily with a floor pump. Test your specific combo before spending money. First, you should exhaust the free methods — at least if you want to avoid buying gear you might never need again.
Sealant Timing and Rotation Mistakes That Cause Leaks
Probably should have opened with this section, honestly, because it’s where most new tubeless riders fail on their second or third attempt.
Add sealant only after the bead is fully seated and holding pressure for at least 30 seconds. Sealant before seating creates a slippery mess where the bead can’t grip the rim shelf properly. I’ve watched people pour sealant in immediately, then spend 20 minutes fighting a tire that would have seated in 90 seconds dry.
Once the bead is locked and pressure is stable, remove the valve core, add 2 to 4 ounces of sealant — Stan’s NoTubes Tire Sealant is the industry standard, though Orange Seal works well too — and reinstall the core.
Now rotate. Spin the wheel through all four cardinal directions, holding each position for 5 to 10 seconds. This coats the entire inside of the tire and bead area, sealing small gaps the bead alone can’t close.
The tire will lose pressure over the first day. That’s normal. Some sealants need 24 hours to fully cure. Check pressure the next morning. Lost more than 5 psi? The bead probably isn’t fully seated. Rotate again, pump it back up, wait another 24 hours. Holding steady? You’re done.
When the Tire Still Will Not Seat — Last Resorts
Valve Core Swap
Try a valve core from a different brand. Some cores restrict airflow more than others — Stan’s cores are famously loose and fast-flowing, while Schwalbe cores run tighter. If your current core feels restricted even after cleaning, a Stan’s replacement core might be the best option, as tubeless seating requires fast volume delivery. That is because slow airflow gives pressure time to escape before the bead can lock.
Confirm the Tire Is Actually Tubeless-Ready
Standard clincher tires will not seat on tubeless rims. Period. Check your tire sidewall for “tubeless-ready,” “TLR,” or “UST” markings. If it only says “clincher,” that’s your problem — and it’s not fixable. Return it if you can and get the right tire.
Inspect the Rim Bead Shelf
Look closely at the rim where the bead should lock in. Cracked? Bent? Run your finger along the shelf and feel for rough spots or dents. Small damage here makes seating nearly impossible, even with a blast canister.
Check if the rim is out of round by spinning it slowly and watching the bead shelf gap change. If it shifts noticeably as the wheel turns, the rim is out of true. That requires either specialized rim-truing tools or a professional mechanic. There’s no DIY shortcut here that actually works.
Honest Truth About Incompatibility
Sometimes a tire and rim combination is just incompatible. Budget rims with loose tolerances paired with budget tires that lack aggressive bead structure — they sometimes won’t work together. That’s what makes tubeless endearing to us cyclists — the system rewards matching quality components, and it punishes mismatched ones with a very specific kind of frustration.
If you’ve gone through all three diagnostic categories and nothing works, try the tire on a different rim. Seats immediately? Your rim is the issue. Still won’t seat? The tire is the problem. Swap accordingly.
Tubeless is genuinely worth the initial frustration once you get it dialed. Flats disappear. Traction improves. Rolling resistance drops. The first successful seal is annoying — that part is just true. The hundredth time you roll over glass and keep riding makes every troubleshooting session worth it.

Stay in the loop
Get the latest pro bike tech updates delivered to your inbox.