What Bad Indexing Actually Feels and Sounds Like
This article includes affiliate links. We may earn a commission at no extra cost to you.
Rear derailleur indexing has turned into a moving target with all the conflicting advice flying around. As someone who’s ridden through a full mechanical meltdown at mile 22 of a 40-mile Cascades route on a 2019 Trek Domane, I put in the hours studying what a badly indexed derailleur actually feels like. Today, I’ll share it all with you.
The derailleur was hunting — shifting but never committing. That vague, restless sensation where the chain settles nowhere. Before you start twisting barrel adjusters or poking at limit screws, you need to match your specific symptom to a specific cause. The fix depends entirely on what’s actually happening.
But what is ghost shifting? In essence, it’s when your chain jumps cogs without you touching the shifter. But it’s much more than that. You’re grinding up a climb, chain sitting on the fifth cog of an 11-speed cassette, and under load it suddenly chatters sideways onto the sixth. A second later it drifts back. Over and over. That pattern points straight to cable tension — too loose or too tight — because the derailleur is losing its mechanical reference point under pressure.
The second symptom profile is hesitation on upshifts. You click toward a harder gear, smaller cog, higher up the cassette — and the chain hangs back. Takes an extra click. Sometimes feels like it’s catching mid-transition. Usually means the cable isn’t pulling with enough tension to move the derailleur quickly, or friction has built up somewhere in the housing.
Third is overshooting. You shift to the fifth cog and the chain lands partially on the sixth, creating a metallic rattle until you back off. Sneakier than it sounds — overshooting can also mean a bent derailleur hanger or a cage sitting too close to the cassette.
Spend five minutes in your driveway before touching anything. Pedal gently and shift through the whole cassette. Does the chain hunt randomly? Hesitate on upshifts? Overshoot and rattle? That answer alone saves hours of pointless adjustments. So, without further ado, let’s dive in.
Check These Three Things Before You Touch a Screw
The piece that matters most here. Most guides skip straight to the barrel adjuster — that’s exactly why so many riders end up chasing their tails for an afternoon. A bent hanger or a frayed cable makes every subsequent adjustment meaningless. You’ll spin that barrel adjuster until your fingers ache and still have a twitchy drivetrain.
Hanger Alignment — The Hidden Culprit
The derailleur hangs from a small aluminum tab bolted to the right rear dropout. Bend that tab even 2 or 3 millimeters and the entire derailleur body tilts relative to the cassette. No indexing adjustment fixes a geometry problem.
You can eyeball it without any tool. Spin the wheel slowly and watch the derailleur cage from directly behind the bike. The cage should sit parallel to the cog stack. Pulley wheels should track straight up and down. If the whole derailleur leans inward or kicks outward, you’ve got a bent hanger.
The Park Tool DAG-2.2 Hanger Alignment Gauge runs about $40 and is the cleaner solution. Most shops will also bend-check your hanger for free or for a couple dollars — worth asking. Don’t skip this. Hangers bend from crashes, rock strikes, even a clumsy lean against a wall. If your bike has gone down on the right side at any point, check the hanger first. Learn from what tripped me up of spending 45 minutes on cable tension before noticing a hanger that was visibly off.
Cable Condition and Routing
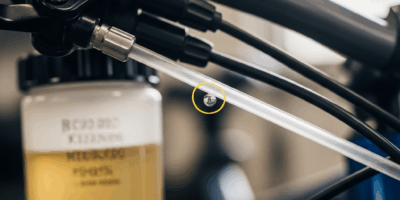
Run your fingers along the full length of the derailleur cable — from the shifter body all the way down to the pinch bolt on the derailleur. Feel for fraying, kinks, or stiffness. A cable that’s spent two winters in the rain without attention moves like a rusty gate latch. Fine-tuning a cable like that is essentially pointless.
Visible damage means replacement. A fresh Shimano or SRAM inner cable costs $4 to $8. Takes maybe ten minutes. More often though, the cable just needs lubrication — spray a light cable lube into the housing while working the shifter several times. It should feel slick. If it feels gritty, that’s your problem right there.
Also check routing through all the frame stops and guides. A cable pulled tight around a sharp bend creates friction that throws off indexing no matter how well everything else is set. Sounds trivial. It isn’t.
Physical Damage to the Derailleur Body
Inspect the cage arms for cracks or bends. Check the pulley wheels — do both spin freely, or is one dragging? Tighten the mounting bolt if it has any play (5mm Allen key on most systems). A derailleur that absorbed a hit might look intact but have enough internal damage to prevent consistent tension control.
Cracked cage or seized pulley means replacement is the smarter call. A Shimano Altus derailleur runs $25 to $35. Deore or 105-level options sit around $60 to $90. Before buying, verify your replacement derailleur matches your shifter generation and cassette speed — a mismatched component wastes the money entirely.
Once hanger, cable, and derailleur body are confirmed good, you know the problem is indexing. Cable tension, limit screws, or some combination of both.
How to Set Cable Tension With the Barrel Adjuster
This is the fix that resolves most indexing complaints. It’s also the one people get wrong because they don’t start from the right reference point.
Shift to the middle chainring and place the chain on the middle cog of the cassette. On an 11-speed, that’s the sixth cog. This neutral position is your baseline — adjustments are smaller and easier to read from here.
Find the barrel adjuster. On most Shimano derailleurs it’s a small threaded cylinder sitting at the top of the derailleur body where the cable enters. On SRAM systems it’s often built into the shift lever itself — check your component manual if you’re unsure. I’m apparently a Shimano person and the derailleur-mounted adjuster works for me while lever-mounted adjusters never feel as intuitive.
Now use the half-turn method. Shift down one cog toward an easier gear — the seventh cog. That shift should be silent and instant. Slow or hesitant means the cable is too tight. Back the barrel adjuster out counterclockwise by half a turn, return to the middle cog, try the downshift again. Repeat until it snaps cleanly.
Then shift up one cog toward a harder gear — the fifth cog. Same standard: instant and silent. Overshooting, rattling, or sluggishness means turning the barrel adjuster clockwise by half a turn. Return to middle, retry.
Five or six half-turn adjustments usually gets you there. What does correct feel like? A quiet click from the shifter, a fraction of a second of chain movement, then silence. No rattle. No lag. No hunting.
Shift through the full cassette under light pedal pressure. If the middle range is now clean but you’re seeing issues at the extreme ends of the cassette — hardest or easiest cogs — that’s a limit screw problem, not cable tension. That’s what makes this diagnostic approach endearing to us home mechanics. Different symptoms, different screws.
When to Adjust the Limit Screws Instead
The H and L screws control the physical travel range of the derailleur. Many riders confuse these with indexing adjustments. They’re entirely separate.
The H screw — high gear limit — prevents the chain from overshooting the smallest cog and dropping into the spokes. The L screw — low gear limit — stops the chain from falling off the largest cog into the dropout.
The symptom that tells you it’s a limit screw issue: the chain physically falls off the cassette, or gets close enough that you hear metal-on-metal contact. Chain going slack. That’s different from mid-cassette hesitation or ghost shifting. Those are cable tension problems. Chains dropping off the ends entirely — that’s limits.
For the H screw, shift to the smallest hardest cog. Pedal gently and watch the derailleur from behind. Chain threatening to skip past the cog toward the spokes? Turn the H screw clockwise by a quarter turn. Test. You want the chain sitting on the smallest cog with roughly 1mm of clearance between cage and cog — close, but not rubbing.
For the L screw, shift to the largest easiest cog. Same process. Chain drifting toward the dropout? Quarter turn clockwise on the L screw. Repeat until the chain sits safely on the largest cog with a small margin to spare.
Quarter turns only. Test after each one. This isn’t a race.
Still Shifting Badly? Here Is What to Do Next
You’ve checked the hanger. Cleaned and lubed the cable. Dialed in cable tension with the barrel adjuster. Confirmed the limit screws. And the derailleur still shifts like it’s working against you. A few secondary causes are worth knowing.
A worn cassette or stretched chain won’t shift cleanly even with perfect derailleur setup. Chains stretch roughly 0.5 percent per 1,000 miles — measure yours with a Park Tool CC-2 chain wear indicator. Worn cassettes develop hooked teeth that don’t mesh cleanly, especially with a fresh chain replacement. If your cassette has three years of real riding on it or 3,000-plus miles, replacement is cheaper than continued frustration. A decent 11-speed cassette runs $40 to $120 depending on brand and range.
A derailleur cage that looked fine during inspection can still be subtly bent inward from a previous impact, restricting pulley movement just enough to cause problems under load. If the derailleur barely responds after all these steps, a $50 replacement often ends the whole conversation faster than further diagnosis.
Incompatible components cause more problems than people expect. An 11-speed shifter paired with a 10-speed derailleur will never index correctly — the cable pull ratios don’t match, full stop. Check your shifter generation against your derailleur and cassette before spending more time on adjustments. Shimano’s compatibility chart on their website resolves this in about two minutes.
At some point the honest call is this: spend $40 to $150 on replacement parts and retry the process, or hand the bike to a good mechanic. A competent shop mechanic diagnoses in 15 minutes what a home mechanic might chase for hours. That’s not a failure — that’s just knowing when a second set of hands is worth the cost.


Stay in the loop
Get the latest pro bike tech updates delivered to your inbox.