“`html
What Causes Chain Noise When Shifting Gears — And How to Fix It
I’ve been cycling seriously for about eight years, and the single most annoying sound my bike makes isn’t a flat tire or brake rub. It’s that metallic grinding, clicking, or rattling that happens when I shift gears. The frustrating part? Most online articles tell you to just replace expensive parts. That’s nonsense.
Here’s what I learned the hard way: Bike chain noise when shifting gears starts with diagnosis, not replacement. I dropped $180 on a new chainring once that didn’t solve a thing. Turns out my derailleur was just misaligned — three minutes with an Allen key and I was done.
The noise you’re hearing falls into one of three root causes: derailleur misalignment, worn chainrings, or cable tension issues. Each sounds different. Each has a different fix. And honestly, you can diagnose and solve at least two of them without leaving your garage.
What Causes Chain Noise During Shifts
Before you start adjusting anything, understand what you’re hearing. The three culprits create distinct sounds, and nailing down which one applies to your bike saves you hours of wasted troubleshooting.
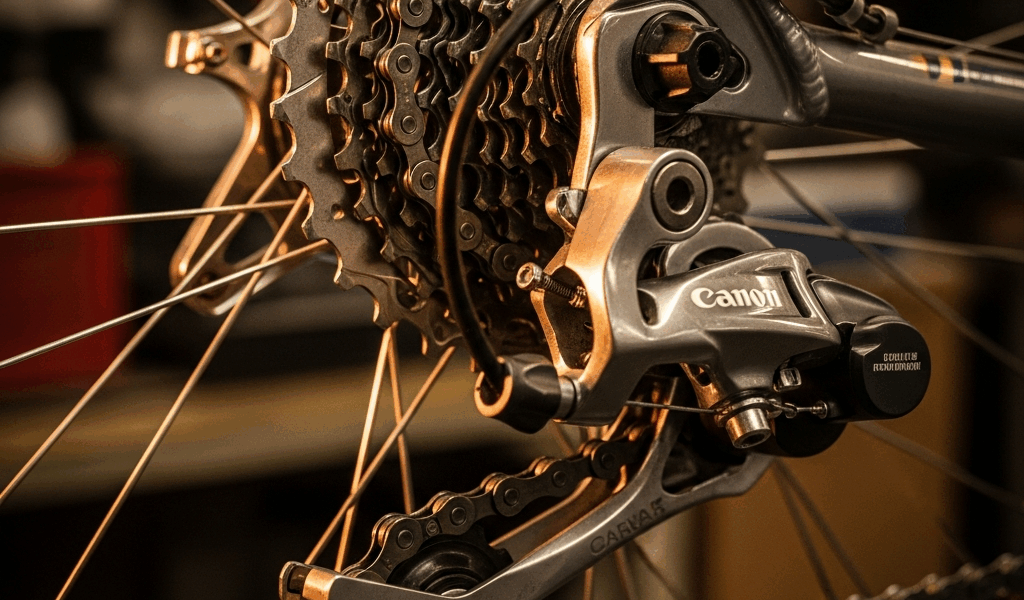
Derailleur misalignment produces a grinding or scraping noise. It sounds like something’s rubbing against metal. This happens when the derailleur cage isn’t lined up with your chainrings or cassette. The chain’s still moving, but it’s not moving cleanly. I experienced this for an entire month before I realized what was wrong. Every shift felt rough, and the noise got worse under load. Really rough under load.
Loose cable tension creates a clicking or chattering sound. The derailleur struggles to move the chain crisply between cogs, so the shift takes longer than it should. You’ll notice the chain hesitates mid-shift. The noise sounds almost like a mechanical hiccup — rapid and slightly metallic. It’s unmistakable once you hear it.
Worn chainrings produce a sharp, repetitive clicking that happens in the same spot every rotation. The chain catches on hooked or damaged teeth, then releases. This is usually the one problem that requires replacement, but I’ll explain when that’s actually necessary.
Pay attention to when the noise occurs too. Does it happen only when shifting to smaller cogs? Only to larger cogs? Only under load? This detail narrows your diagnosis significantly — probably should have led with this, honestly.
How to Check Derailleur Alignment First
Ninety percent of chain noise issues stem from derailleur misalignment. Start here. You need no tools except your eyes and maybe a clean rag.
Shift your bike to the middle chainring and the smallest cog on your cassette. This centers the chain laterally, making alignment issues obvious. Now look down from above at how the chain sits in the derailleur cage. The chain should run straight through without rubbing on either side of the cage.
Here’s what I look for: the outer plate of the cage should clear the chain by about 1-2mm on each side. If the chain is touching either wall of the cage, you’ve found your problem. That contact creates the grinding noise you’re hearing.
Now shift to the largest cog and middle chainring. Look at the same spot. The chain alignment should look identical — no rubbing, consistent clearance. Don’t skip this step.
If you see rubbing in either position, you’ve likely got a bent derailleur hanger. This is the small metal tab that attaches the derailleur to your frame. Bent hangers are incredibly common from impacts or rough handling during transport. The fix depends on severity. Minor bends sometimes respond to gentle realignment using a specialized hanger alignment tool that costs $30-50, but significant bends often require professional work or hanger replacement ($15-40 for the part itself).
If alignment looks clean — no rubbing, straight chain line — move to the next section. You’re probably looking at a cable tension issue.
Adjust Cable Tension If Shifting Lags
Probably should have opened with this section, honestly. Cable tension is the easiest fix and the one most people can handle in three minutes.
Located near your derailleur, you’ll see a barrel adjuster — a small cylindrical knob usually on the derailleur cable where it connects to the derailleur body. This adjuster creates more or less tension on the cable, which controls how eagerly the derailleur responds to your shifter inputs.
Shift to your middle chainring and middle cog. Now try shifting up one gear. Does the chain hesitate before moving? Does it make a chattering sound before settling? That’s tight cable tension. The derailleur isn’t pulling the chain over crisply because the cable doesn’t have enough slack.
Turn the barrel adjuster counterclockwise — away from the derailleur — by half a turn. Shift up again. Listen. Does it move faster and quieter? Yes? Turn another half turn and test again. No? Turn clockwise instead — you may have the direction wrong, or your issue isn’t cable tension.
The key is half-turn increments. Don’t spin it wildly. Each small adjustment changes the feel noticeably. I’ve had success with 2-3 half-turns fixing shifting hesitation completely.
After adjusting, cycle through all your gears multiple times. The shift should feel snappy in both directions, and the noise should vanish or become barely noticeable. If you still hear grinding or clicking after cable adjustment, and alignment checked out, you’re looking at chainring wear.
Here’s the thing: this adjustment is completely reversible. If something feels wrong, turn the barrel adjuster back to where you started. Zero risk involved.
Inspect Chainrings for Wear or Damage
Chainring wear is less common than derailleur issues, but it happens. Worn chainrings develop hooked or shark-fin teeth that catch the chain rather than smoothly guiding it.
Shift to the middle chainring and rotate the crank slowly, watching how the chain engages with the teeth. Healthy teeth look symmetrical — uniform in shape and angle. Worn teeth look asymmetrical. They slope forward or form a hook shape at the tip. If the chain is catching and releasing repetitively, creating that clicking noise, this is what you’re seeing.
Run your fingernail across the teeth — be careful, they’re sharp. Worn teeth feel sharp and irregular compared to newer chainrings, which have a slightly rounded tooth profile. Cracked chainrings are obvious — you’ll see actual fractures in the teeth or between teeth.
Here’s the honest part: worn chainrings can’t be sharpened or repaired. Replacement is the only real fix. But before you panic about cost, understand that mild wear doesn’t always require immediate replacement. If the noise is subtle and you’re not in a rush, you can ride it for a while longer. I kept a mildly worn chainring running for another 1,500 miles while I saved up for a replacement. The noise was annoying but not destructive.
Chainrings typically cost $40-120 depending on your bike’s drivetrain type. Shimano makes affordable options for most bikes. Installation requires a crank arm removal tool ($20-30 if you don’t own one), though shops will install one you buy elsewhere for $15-20 in labor.
Check all three chainrings if your bike has them. Wear is usually worst on the middle and small rings where you spend most time.
When to Stop and Visit a Shop
Some problems are beyond DIY scope. Knowing when to stop saves you from making things worse.
Bent derailleur hanger. I mentioned this earlier. If visual inspection shows your chain rubbing despite correct cable tension, the hanger is likely bent. Minor bends occasionally respond to careful manual straightening, but most bent hangers need professional alignment or replacement. Shops have hanger alignment tools that cost hundreds of dollars — worth the $20-30 you’ll spend on labor.
Broken or frayed shifter cable. If you see visible damage to the cable itself — fraying, kinks, or breaks — that cable can’t transmit clean shifts anymore. Replacement is necessary. This is where a shop visit makes sense because routing new cables correctly requires experience. Cost is typically $15-35 including labor, depending on your drivetrain type.
Metal shavings in the chain or drivetrain. If you’re finding magnetic metal fragments stuck to your chain or scattered around your drivetrain, something is wearing or grinding internally. This requires a professional assessment because it could indicate chainring damage, cassette damage, or derailleur wear that isn’t obvious visually.
Derailleur damage beyond misalignment. If the derailleur cage itself is cracked, the pulleys are broken, or the derailleur won’t move at all even after cable adjustment, replacement is the answer. Derailleurs cost $30-150 depending on your bike’s groupset. Labor adds another $20-30.
The diagnostic work I’ve outlined — visual inspection, cable adjustment, chainring examination — costs you nothing and takes maybe 20 minutes total. Do this first. Only if it reveals bent hangers, broken cables, or obviously worn chainrings should you involve a professional. That’s how you stay out of the bike shop for routine maintenance and handle the stuff you actually can fix yourself.
“`

Stay in the loop
Get the latest pro bike tech updates delivered to your inbox.