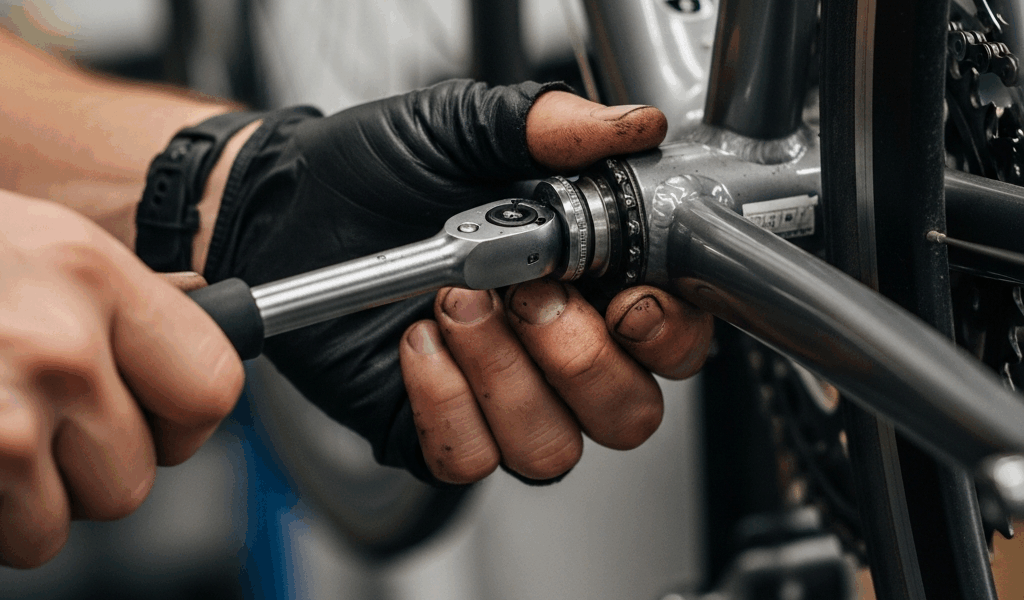
Bottom Bracket Creaking Under Load — How to Find and Fix It
Bottom bracket creaking has gotten messy with all the conflicting advice flying around. Chase the wrong lead and you’ve burned a Saturday morning pulling cranks off a bike that just needed a greased pedal thread. As someone who’s hunted this exact noise across three different bikes — a steel touring rig, an aluminum endurance build, and a carbon race frame — I dug into the practical details of what actually causes it and, more importantly, what doesn’t. The approach here is isolation first. Targeted fix second. If you skip to the repair section without running the diagnostic, don’t blame me when the creak comes back on your next ride.
Is It Actually the Bottom Bracket — The 3-Minute Test
Most creak diagnoses fail before they even start. The assumption is always the BB because the noise happens while pedaling. But pedaling loads six contact points at once — pedals, cranks, BB shell, chainring bolts, seatpost, saddle rails. Every single one of them can produce a rhythmic creak that sounds like it’s coming from somewhere between your knees.
Here’s the isolation method I use before touching anything.
The Seated vs Standing Test
Ride normally. Note when the creak shows up. Then run these two back to back:
- Seated, low effort: Spin at 90 RPM on flat ground with minimal pressure. No creak? Good.
- Standing, hard effort: Get out of the saddle and stomp on the pedals up a moderate climb. Creak returns?
If the noise only appears under load — especially standing — and vanishes when you’re spinning easy, you’ve narrowed it down. That pattern points to the BB or cranks. A seatpost creak, by contrast, usually shows up seated and under load but disappears when you stand. Saddle rail creaks are almost exclusively seated. That distinction matters.
The One-Leg Test
This takes maybe 90 seconds. Pedal using only your right leg — left foot completely off the pedal. Listen. Switch sides. If the creak only appears on one side, you’re probably looking at a pedal thread issue or a crank arm bolt on that side, not the BB. A true BB creak fires on both sides because both cranks load the same spindle.
The Stationary Stress Test
Lean the bike against a wall. Grab each crank arm individually and push and pull axially — along the direction the spindle runs, not rotationally. Any click or movement means the preload is off. Then grab both crank arms and try to wiggle them laterally while loading the pedals by hand. A creak here is almost certainly the BB interface or the crank-to-spindle junction.
Worth flagging before going further. Half the BB overhauls I’ve done over the years turned out to be unnecessary — the noise was a pedal spindle or a loose chainring bolt, and ten minutes with a 5mm hex key would have solved everything.
Threaded BB Creak — Remove, Clean, Retorque
BSA/English threaded bottom brackets — 68mm or 73mm shell, right-hand drive side threading, left-hand non-drive side threading — are the most forgiving to work with. But what is the actual fix here? In essence, it’s remove, clean, lubricate, and reinstall to spec. But it’s much more than that, because the lubrication choice matters depending on what your frame is made of.
Removal and Inspection
You’ll need a BB tool specific to your cup style. For a Shimano Hollowtech II external cup BB — something like the SM-BB52 or SM-BB72 — that’s the TL-FC32 or an equivalent 16-notch tool. For a square taper or ISIS cup, grab a splined socket. Drop your chain off the chainring before starting.
Pull both cups. Look at the threads in the shell. Dry, bare metal threads are a red flag. Aluminum oxide deposits — a grey-white powder that shows up on alloy frames with steel cups — are worse. That micro-movement between cup threads and shell under pedaling load is what generates the creak, and it’s remarkably good at projecting through the entire frame so it sounds like it’s coming from everywhere at once.
Grease vs Anti-Seize — The Clear Answer
Grease on aluminum or carbon frames. Anti-seize on steel frames. On aluminum frames, the bigger threat is galvanic corrosion between steel or titanium cups and the alloy shell — grease handles that well and provides enough lubrication to stop the creak. On steel frames, corrosion is slower, but thread galling becomes a real problem if you’re repeatedly pulling and reinstalling steel cups into a steel shell. Anti-seize — Loctite 771-64 or Finish Line Anti-Seize both work — reduces that risk without sacrificing creak prevention.
Don’t use threadlocker on BB threads. Avoid the path I took — I used blue Loctite 243 on a Trek Émonda once and spent 45 minutes heating the shell with a heat gun just to get the cups out six months later. Not worth the headache.
Torque Specs
Install both cups by hand until snug, then torque to spec:
- Drive-side cup (right side, reverse threaded): 35–50 Nm
- Non-drive cup (left side, standard threaded): 35–50 Nm
- Shimano external cups specifically: 35–50 Nm per their technical documentation
Carbon frame? Stay at the lower end — 35 Nm. Steel or aluminum with a persistent creak? Going to 50 Nm is fine. Go back and retorque after your first hard ride. Threaded BBs settle slightly under initial load — that’s just how it works.
Press-Fit BB Creak — The Notorious Fix
Press-fit bottom brackets are the reason entire Facebook groups exist. BB86, BB90, BB92, PF30, BB386 — they all share the same core vulnerability: a plastic or aluminum cup pressed into a composite or aluminum shell with no mechanical fastener holding it in place. Under load, the cup micro-moves against the shell. That’s the creak.
Frustrated by a 2019 Trek Domane with a BB86 that creaked through three separate shop visits — two regrease attempts and one full cup replacement — I eventually dug into the actual fix sequence rather than just spraying carbon paste and hoping for the best. Here’s what actually works.
The Loctite 609 Method
Loctite 609 is a retaining compound — not threadlocker, not a traditional adhesive. It fills micro-gaps between pressed components and cures rigid enough to eliminate the movement that generates creak. That’s what makes it the go-to fix for press-fit BB creak when the cups themselves are otherwise undamaged.
The process:
- Remove the crankset and press out both BB cups using a proper press tool or a dead-blow hammer with a correct-sized drift. Never improvise with a screwdriver — you’ll damage the shell.
- Clean the shell bore thoroughly with isopropyl alcohol. Clean the outer cup surface the same way. Let both dry completely — 609 needs clean, dry surfaces to cure.
- Apply a thin, even coat of Loctite 609 to the outer diameter of each cup. Not dripping wet. A uniform film.
- Press the cups back in using a proper BB press tool. The Wheels Manufacturing BB Press Tool runs about $120 — worth every cent if you’re doing this more than once.
- Let cure for 24 hours before riding.
This fixes the creak in roughly 80% of press-fit cases, in my experience.
When Shims Are the Answer
If the shell bore has been stretched from repeated press-fit installations — which happens, especially on older carbon frames — cups won’t seat tightly even with 609 applied. Wheels Manufacturing makes BB shell shims for exactly this problem. The WM-PF30-SHIM set adds 0.5mm to the bore depth and restores the interference fit. Measure your bore diameter with calipers before ordering — standard PF30 bore is 46mm, BB86 is 41mm.
When to Convert to Threaded
Sometimes the right move is abandoning press-fit entirely. BB86 or BB92 frames can convert to a threaded T47 interface using an insert system — the Wheels Manufacturing PF86/92 to T47 conversion kit handles this cleanly. Permanent fix, eliminates all future creak potential for that frame. Cost runs around $80–120 for the conversion kit, plus whatever T47 BB you want to run. For frames that have seen four or more press-fit BB replacements, this is the most cost-effective long-term call.
PF30 frames can convert to 30mm spindle threaded BBs using similar kits — or, with the right adapter, run a 24mm spindle if you want to use Shimano cranks. That opens up a whole separate decision tree, but the creak-elimination benefit is identical.
T47 BB Creak — The Rare Case
T47 is the large-diameter threaded standard that was supposed to solve everything — and honestly, it largely has. Creak is rare with T47. When it does show up, the culprit is almost always one of three things.
Check Preload First
T47 external cup designs like the Chris King T47 or Wheels Manufacturing T47 external use a preload system similar to traditional threaded BBs. A loose preload cap — or a crank arm bolt that wasn’t torqued correctly after installation — creates movement at the crank-to-spindle interface that sounds exactly like a BB creak but isn’t. Check crank arm bolt torque first. Shimano cranks use 12–14 Nm. SRAM DUB cranks use 40–54 Nm depending on the model. Those are very different numbers, and using the wrong spec is a surprisingly common mistake.
Clean and Re-Grease the Threads
T47 uses standard right-hand threading on both sides — that’s the major improvement over BSA. Removal and reinstallation follow the same logic as threaded BBs: clean shell threads, apply grease, retorque to 40–50 Nm. T47 shells are typically larger diameter and better supported, so creak is much less common, but the fix when it does appear is identical to the BSA process.
Creaks That Are Not the BB at All
Here’s where I save you a lot of time. A significant chunk of “BB creaks” aren’t the BB. Run through this list before you pull cranks and commit to an overhaul.
Pedal Threads
Remove both pedals — a 15mm pedal wrench, left side reverse threaded, you know the drill. Clean the pedal threads with a rag. Apply grease — not anti-seize here, actual grease — and reinstall to 35 Nm. Dry pedal threads creak under load, and the sound travels directly through the crank arm. This is the single most common false positive in creak diagnosis. Probably fixes things one out of every four times someone thinks they have a BB problem.
Chainring Bolts
Use a 5mm hex key and snug all chainring bolts. Single chainring setups with a direct mount spider: torque to 8–10 Nm. Traditional 5-bolt rings: 6–8 Nm. Loose chainring bolts produce a rhythmic creak that’s nearly impossible to distinguish from a BB creak by sound alone — same frequency, same timing, same projection point.
Seatpost Clamp
Pull the seatpost completely out of the frame. Clean the post. Apply carbon paste if it’s a carbon post or carbon frame, grease if it’s aluminum on aluminum. Reinstall and torque the clamp to spec — typically 5–6 Nm for a single-bolt clamp, 4 Nm each for dual-bolt designs. A seatpost creak usually appears seated and under load, which overlaps enough with the BB creak profile to fool most people.
Saddle Rails
The rails where they contact the saddle clamp can creak under rider weight — especially after a few wet rides. Remove the saddle, clean the rail contact surfaces, apply a thin layer of grease, reinstall. Carbon-railed saddles like the Fizik Antares R1 are apparently notorious for this. Caught me off guard the first time.
Headset
Less common as a pedaling creak, but worth ruling out before going further. A loose headset typically clicks under braking and cornering more than pedaling — but on climbs where you’re pulling hard on the bars, it can absolutely mimic a BB creak. Check headset preload by squeezing the front brake and rocking the bike fore-aft. Any play, click, or clunk means headset preload adjustment comes before anything else.
Work through this list before you pull the cranks. More often than not, the answer is a greased pedal thread and five minutes with a torque wrench — not a full BB replacement. The systematic approach isn’t the exciting answer. But it’s the right one, and your Saturday mornings are worth more than a creak that comes back two weeks later.


Stay in the loop
Get the latest pro bike tech updates delivered to your inbox.