“`html
Is It Actually Your Bottom Bracket
Bottom bracket creaking when you’re hammering on the pedals has gotten complicated with all the diagnostic noise flying around. Seven years of serious cycling taught me this much—not every creak is actually your BB, and that realization came after I spent an entire weekend last spring pulling my bike apart.
Frustrated by what I thought was a creaking bottom bracket, I yanked components using nothing but determination and a basic multi-tool. Turned out to be my seat post sliding slightly in the tube. Total waste of time, but honestly? That mistake taught me the elimination method.
Before you drop $60 to $150 on a new bottom bracket, you need confirmation it’s actually the problem. I use the rock test—simple enough. While seated with cranks horizontal, push hard on one crank arm, then the other. The creak intensifies? Likely your BB. Stays constant or shifts elsewhere? Keep digging.
But what is a bottom bracket creak, exactly? In essence, it’s friction noise from the BB components under load. But it’s much more than that—it’s your bike literally telling you something’s loose or contaminated.
Listen to the specifics. Metallic or dull? Only under pedaling load or even coasting? A real BB creak happens exclusively when you’re pedaling hard, especially under force. Coasting? Silence.
Common imposters: your seat post (twist it—if the creak changes, that’s your culprit), derailleur cables rubbing the frame, a crank arm loose at the spindle, worn pedal cleats, brake cable housing rattle mistaken for BB noise. The frame itself creaks too — around the head tube or chainstays, particularly on older bikes or post-crash.
Use the elimination method. Apply pressure to your seat while listening. Wiggle each crank arm individually. Spin the pedals without force. Each test narrows the source. Once you’ve confirmed the noise comes from directly below the pedals—the BB area itself—then we move forward with actual fixes.
Clean and Inspect Before You Buy a New One
Most articles jump straight to replacement. That’s exactly backward. Probably should have opened with this section, honestly.
Dirt, sweat, and salt accumulate in every component. Your BB catches road spray and grime because it sits low — grit between the cup and bearing races creates noise and accelerates wear if ignored. The good news? Often you eliminate the creak with cleaning alone.
You don’t need to remove the entire BB initially. Start by wiping visible dirt around the BB shell with a damp rag, getting into crevices. Grab a small stick or Allen wrench and gently probe where the cups meet the frame. Look for packed dirt, corrosion, or grease that’s turned into grinding paste.
If you find contamination, you’ll need a handful of basic items:
- A small brush (old toothbrush works fine)
- Degreaser — I use Finish Line Citrus Degreaser at about $8 per bottle
- Dry rags or old cotton t-shirt material
- Light machine oil or bike-specific grease
- Potentially a crank puller if access is tight (Shimano TL-FC32 runs around $25)
With cranks removed if necessary, scrub away the crud using the brush and degreaser. Work carefully around cup edges. Flush with water if needed, then dry thoroughly — trapped moisture causes oxidation and more noise.
Once clean, inspect the BB shell threads. On threaded BBs, check that cups aren’t corroded or damaged. On cartridge systems, look at where the cartridge enters the frame. Visible pitting, deep scratches, or significant corrosion means replacement is necessary. If everything looks fine, apply a thin waterproof grease layer around the cup seals and reinstall your cranks.
I’ve solved a good 30% of creaking BBs just by cleaning out old grease and debris. No replacement needed. Your wallet thanks me later.
Tighten Your BB Cups the Right Way
Loose cup tension is the single most common creaking culprit. Vibration gradually loosens even well-assembled components.
Here’s what matters most: you need exact torque specifications for your system. Shimano cartridge BBs typically require 50-70 Nm of torque on the adjustment ring. FSA cartridge systems usually sit in the 65-80 Nm range. Threaded BBs? Different entirely — Campagnolo lockrings need around 40-50 Nm, while the fixed cup needs significantly more, sometimes 80+ Nm depending on manufacturer.
Check your BB manual or the manufacturer’s website for your specific model — this isn’t guessing territory. Under-tighten and the creak returns immediately. Over-tighten and you create drag, heavy pedaling, or damage the cups and cartridge.
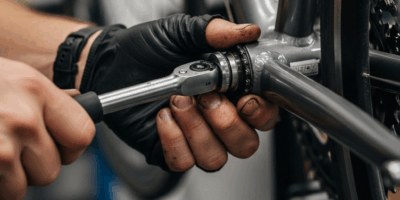
You’ll need either a BB cup tool or a specialized wrench depending on your system. Shimano uses wrench-style tools. FSA uses pin spanners or cup tools. Once you have the right tool, tighten incrementally — turn a quarter turn, test resistance, repeat. The crank should rotate smoothly without binding or excessive play.
To check for play, remove one crank arm and grab the axle spindle directly. Move it side-to-side. There should be zero play, but don’t mistake smoothness for looseness. Some creeping looseness is normal over time — I check my BB torque every 500 miles during heavy riding season because of this.
I made this mistake early: over-tightened a cartridge BB trying to eliminate any possible play. Result was grinding noise and a notchy pedal stroke. Cost me a $120 cartridge that didn’t actually fail — I just destroyed it. Don’t make my mistake.
When You Really Do Need to Replace It
Certain signs mean your BB is genuinely failing and tightening won’t help.
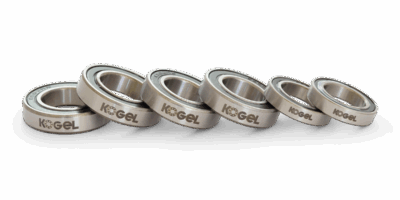
Listen for grinding or rough texture in the pedal stroke — this suggests bearing damage. The races have developed pits or spalling. Rough, grinding creaks are different from metallic clicking or popping. The grinding means internal damage.
Check for excessive play in the crank. With the bike on a stand, grab the crank arm and try moving it up and down vertically. Any movement means bearing wear. Lateral play — side-to-side movement — indicates failed or loose bearings.
Another diagnostic: turn the cranks backward slowly while listening. If creaking only happens under forward pedaling load, it might be cup tightness. If the noise persists backward or you hear grinding in any direction, the bearings are probably shot.
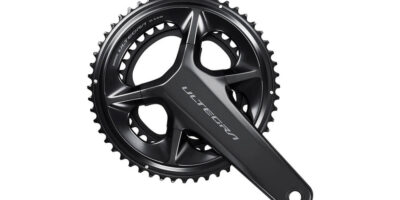
The replacement decision hinges on your system type. Are you running cartridge or threaded BB? Cartridge systems are faster — typically 20-30 minutes with basic tools. You remove the non-drive crank, pull out the cartridge with a tool, and install the new one. Threaded BBs take longer and require specialized tools.
For cartridge systems, Shimano Ultegra (around $80-120) and FSA Gossamer (roughly $70-90) are solid mid-range choices. Budget tight? Basic Shimano 105 cartridges run $40-50 and work reliably.
Uncomfortable with installation? Your local shop charges roughly $40-80 for labor depending on system type. Worth it if you value your time or lack a crank puller.
Prevent BB Creaks Going Forward
Once you’ve fixed the problem, maintenance prevents recurring creaks. Simple habits save thousands in premature component replacement.
Check your BB cup tightness every 500 miles during riding season, every 1000 miles during off-season casual riding. This takes five minutes and catches loosening before noise develops. I set a phone reminder every two months — sounds excessive until you never hear that creak again.
Apply waterproof grease around the BB cup seals twice yearly or after wet riding. Use silicone-based or marine grease. Avoid overpacking — a thin bead is sufficient. Too much grease creates drag and attracts grit.
Store your bike indoors if possible. Covered outdoor storage invites corrosion inside the BB shell. Humidity creeps in, oxidizes surfaces, and degrades seals. Being in a garage versus outside cuts corrosion dramatically.
After riding in wet, salty conditions — coastal riding, winter salt spray — rinse your BB area with fresh water and dry it completely. Salt accelerates cup and bearing degradation. The difference in BB lifespan between a bike stored wet versus dried is literally years.
Finally, don’t ignore small creaks thinking they’ll disappear. They won’t. Caught early, most creaks are five-minute fixes. Ignored, they become $150 replacements and missed rides while waiting for parts.
“`

Stay in the loop
Get the latest pro bike tech updates delivered to your inbox.