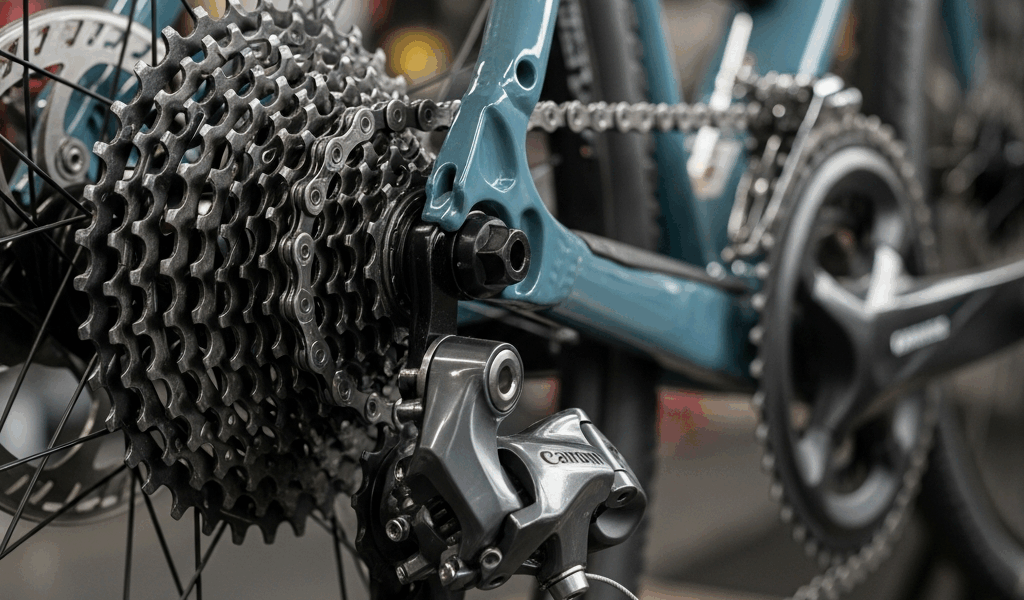
Why Your Front Derailleur Won’t Shift Up
I’ve spent more hours than I’d like to admit with my face inches from chainrings, staring at a derailleur that simply refuses to move to the big ring. As someone who’s rebuilt my own drivetrain components on everything from a $400 Craigslist road bike to a $2,800 gravel setup, I’ve learned there’s really only two things causing this mess: your cable’s gone slack or that high-limit screw got set wrong.
Here’s what’s happening mechanically. Your derailleur cage moves because a cable—usually 1.2mm stainless steel—pulls it toward the big ring. Think of it like a rope tied to the cage. If that rope isn’t tight enough, it goes slack before reaching its destination. The high-limit screw? That’s your safety stop. It prevents the derailleur from shifting past the big ring and destroying itself on your frame. Set it too far inward and the cage physically cannot reach where it needs to be.
Most riders already know their derailleur exists. They’ve clicked the shifter repeatedly. They’ve wiggled things. That’s why I’m skipping the basic troubleshooting and jumping straight to what actually works.
The Quick Check Before You Adjust Anything
Play detective first. You need to know if your derailleur can physically move.
Shift to your smallest cog in back and small ring in front. Now grab the derailleur cage—that thin metal part wrapping around your chainrings—and push it toward the big ring by hand. Can you move it all the way until it touches the big ring? Do this gently. You’re checking mechanical freedom, not testing your strength.
If the cage moves freely and reaches the big ring without resistance, your derailleur hanger isn’t bent. That’s good news. Your problem is cable tension or limit screw position. If the cage feels stuck, grinding, or won’t move past a certain point — you might have a bent hanger or internal damage. That’s a different conversation.
Now shift normally using your shifter. Watch that cage. Does it move at all toward the big ring, or stay motionless? Even slight movement tells you the cable has tension. No movement at all means the cable is either completely slack or broken.
One more check: trace your cable from shifter to derailleur. On a road bike, it’s usually the top tube. On gravel or mountain bikes, it wraps underneath. Do you see kinks, crushed sections, or rust? A cable bent at 90 degrees or torn at the housing ferrule won’t pull properly, no matter what you adjust.
Fix 1: Increase Cable Tension Step by Step
Probably should have opened with this section, honestly. Cable tension is the fastest fix — it accounts for roughly 70% of front derailleur failures I’ve encountered.
Find your barrel adjuster. On most bikes, it’s where the cable housing meets the derailleur. It looks like a cylinder with visible threads. The cable runs through its center. Turn it and you’re changing the cable’s effective length, which changes tension.
Here’s the critical part: turning the barrel adjuster counterclockwise (away from you, looking at the drive side) increases tension. Clockwise decreases tension. I got this backward once and felt foolish forever.
Start with quarter-turn adjustments. Shift to the small ring, then attempt the big ring. Feel the shifter’s feedback. A properly tensioned cable pulls the cage smoothly. If the cage barely moves, turn the barrel adjuster another quarter turn counterclockwise. Wait a few seconds between shifts — your cable needs time to settle.
You’ll notice a symptom pattern. At first the cage refuses to move. After one quarter turn, it moves slightly but won’t seat the chain on the big ring. After two turns, it seats the chain but feels mushy — delayed. After three or four turns, the shift becomes crisp. After six turns, something strange happens: the derailleur overshoots upshifts or the cage feels hyperactive. That’s your stop signal.
The sweet spot usually lives around 2 to 4 quarter-turn adjustments from factory position. Every bike is different — cable routing, derailleur model, shifter type all matter. A Shimano 105 setup behaves differently than SRAM mechanical. No universal number exists.
Test shifting from small to big ring five times straight. Then shift back and forth rapidly. The shift should feel quick and reliable in both directions. If the cage seats on the big ring but struggles downshifting back to small, you’ve gone too far — turn the barrel adjuster clockwise by half a turn.
Fix 2: Adjust the High Limit Screw
Your derailleur has two limit screws. The high-limit screw (marked “H”) prevents overshifting toward your crankset’s outside. If cable tension is perfect but the cage still stops short of the big ring, this screw is your culprit.
Locate the high-limit screw — usually a small Phillips or hex screw on the upper-outer derailleur body. Different brands position these differently. A quick search for “[Your derailleur model] high limit screw” confirms location immediately.
That tiny screw controls maximum cage travel. It’s safety engineering. Without it, your chain jams between the big ring and frame. Every front derailleur needs this set correctly, not guessed at.
Shift to the big ring using your shifter. Now grab your cage and push it outward by hand — toward your frame. It should stop abruptly. That abrupt stop is the limit screw working.
If you can push the cage significantly past where your chain sits on the big ring, the screw is too loose. Turn it clockwise (inward) in half-turn increments. After each adjustment, shift to the big ring and test. You want the cage resting with about 1 to 2mm clearance between cage and chainstay. Not touching. Not dangling. Confident spacing.
If the cage can’t reach the big ring and you’ve already increased cable tension properly, the limit screw is too tight. Turn it counterclockwise (outward) in half-turn increments until the cage can physically seat the chain on the big ring.
Perform the five-shift test again. The chain should seat cleanly on the big ring every time. No hesitation. No grinding. If it works, you’re done. If it works but feels sluggish shifting down from the big ring, the high-limit screw still interferes — loosen it slightly.
When to Stop Troubleshooting and Seek Help
Some problems hide behind cable tension and limit screw issues. If you’ve made these adjustments and nothing improves, you’re looking at something deeper.
A bent derailleur hanger happens frequently. The hanger is that small bracket attaching your derailleur to the frame. A crash or hard shift into the chainring bends it. The cage position shifts, and suddenly your limit screw setting doesn’t work anymore — the derailleur’s mechanical zero point has changed. Visual check: does your derailleur cage hang at an odd angle in its resting position? Does it look rotated compared to the big ring’s teeth? That’s a bent hanger. You need a hanger alignment tool or professional service. You can’t adjust this away.
A broken cable is obvious in retrospect. The cable won’t pull when you shift, and barrel adjuster turning produces zero effect. You need replacement cable and housing. Shimano cables cost $8 to $15. SRAM runs similar. Spend the money rather than forcing a broken cable.
A worn shifter occasionally causes problems. If your shifter clicks but produces less mechanical advantage with each click — later clicks require harder pressure — the internal pawl or ratchet is wearing out. This usually affects both front and rear shifting. A professional diagnoses this with certainty.
If your derailleur cage moves freely by hand, cable tension is good, limit screws are set correctly, and shifts still fail inconsistently, a warped cage or damaged derailleur arm is possible. These require replacement. Aluminum cages dent. They don’t unbend.
Go professional if you’ve adjusted cable tension through its full range and nothing works, or if visual inspection reveals bent components. A bike shop diagnoses hanger damage in 30 seconds with their alignment tools. It costs money upfront, but it saves the frustration of chasing mechanical solutions to alignment problems.

Stay in the loop
Get the latest pro bike tech updates delivered to your inbox.